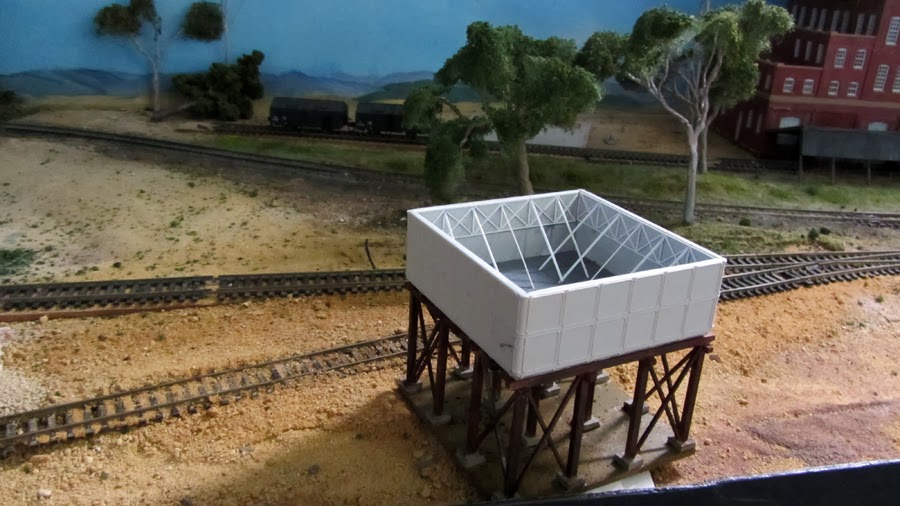
The timber stand was an easy enough building however removing the parts from the main block did create some problems, especially with the first one where I some small pieces pretty well disintegrated, but they glued back together pretty easily using PVA.
Following that problem I cut the remainder out from the board along the grain at each of the bearer ridges (can't think of the correct name) these ridges are connected by small nitches of timber which are quite hard even with a brand new blade. By removing as much of the timbers along the grain really gives a lot more room to work in to remove the parts. I spoke to Rod Kelly about this & he is going to work on the kit to make it easier to remove.
I thank Rod for the ease of talking to, & ever willingness to discuss issues with his products & make any required alterations. I now am waiting on 3 more of his stands to complete my needs.
The big arrival was from Ian Phemister with the windows for the roundhouse last week, a quick nights cleaning & gluing the window panes into the frames, priming & then giving them an initial paint using Sonjas Acrylic Nimbus Grey which I use to get a nice flat base for my R/S & found excellent here as well. I then used Acrylic soft pastels to weather the windows. A final coat is still to be done on the panes as RH windows were usually painted white but for some reason got pretty dirty over time.
The windows were then sat in place along the back wall of the RH, using blue tack to hold them roughly in place.
Once in position I was pleased to see that the rear wall & side measurements had come together pretty well, some minor adjustments only are needed with minimal gaps between windows, any filing that is needed will be done with some thin timber left over from the main construction.
The next step was to test fit the main RH building.
Again I am pretty happy with the result, although more work will be needed with this part of the construction, I am glad I have gone this route in building the whole structure, & thankfully there is not a lot of adjustments needed, overall I have to add around 1/2 inch to the rear or outer truss width on the R/H side, & about the same to the L/H mid section of the truss.
I wanted to build the RH as close to the plans as I could but the fine work of needing scale 3x2 timbers for the roof bearers really made me wonder at the sense of it, they were a right royal pain in the proverbials, but I persevered but really should have stopped & left them off.
The roof area is fairly extensive so fitting commercial model corrugated iron would have been an expensive proposition, as I have one of the Brunel corrugated iron tools I decided to try it out on the inner truss rear section. I found normal foil & the stuff sold by Brunel being not thick enough, also standard 20micron hairdressers foil the same. Delving into the pantry I found a roll of Woolworth Select heavy duty foil, labelled as caterers grade so decided to try that.
This proved much better & is stronger, but I would not use this method without any sort of support under it. I measured & cut a strip of 1mm Styrene in two sections to cover the length of truss (the white that can be seen in the photo) & then glued using PVA the scribed foil over the top of the styrene, & left it for 24 hours to dry.
Using a very sharp knife I trimmed the foil off the edges, before gluing the whole strip to the rear of the Truss. Care really needs to be taken with using this sort of foil owing to it being quite thin & easy to tear, though the finished item does look quite good
There are basically now two major steps left before securing the RH to the base which is removable & will allow me to work on getting the rear wall, windows & trusses together properly. The iron roof will be done the same using 1mm styrene cut to fit the 8 stalls of the RH, after I finish working on the lighting.


Colin
ReplyDeleteThe roundhouse is looking good.
I am starting to wish that I didn't have Anton's Uneek version but then that would mean that I would have to modify the indexing on his 75' turntable, oh well.
Ray P
Thanks Ray
DeleteIt has been a chore with a lot of twists & turns, certainly the largest scratch built item I have attempted, & will be glad to have it finished. The simple aspect of having the windows from Ian helped a lot & to have the rear wall set up correct for them has a huge sigh of relief.
I am taking a short break from any more work on it, & then will get stuck in to finish it,
Col
Hey Col,
DeleteYep the RH can be / is a right PITA, but your's is looking good as is the water tank, makes me want to do some more on mine, but the S.A cars have priority at the moment.
Cheers Alex.
Sooner you start Col the sooner it will be finished . Chore= Love
ReplyDeletelooks great Col!
Peter